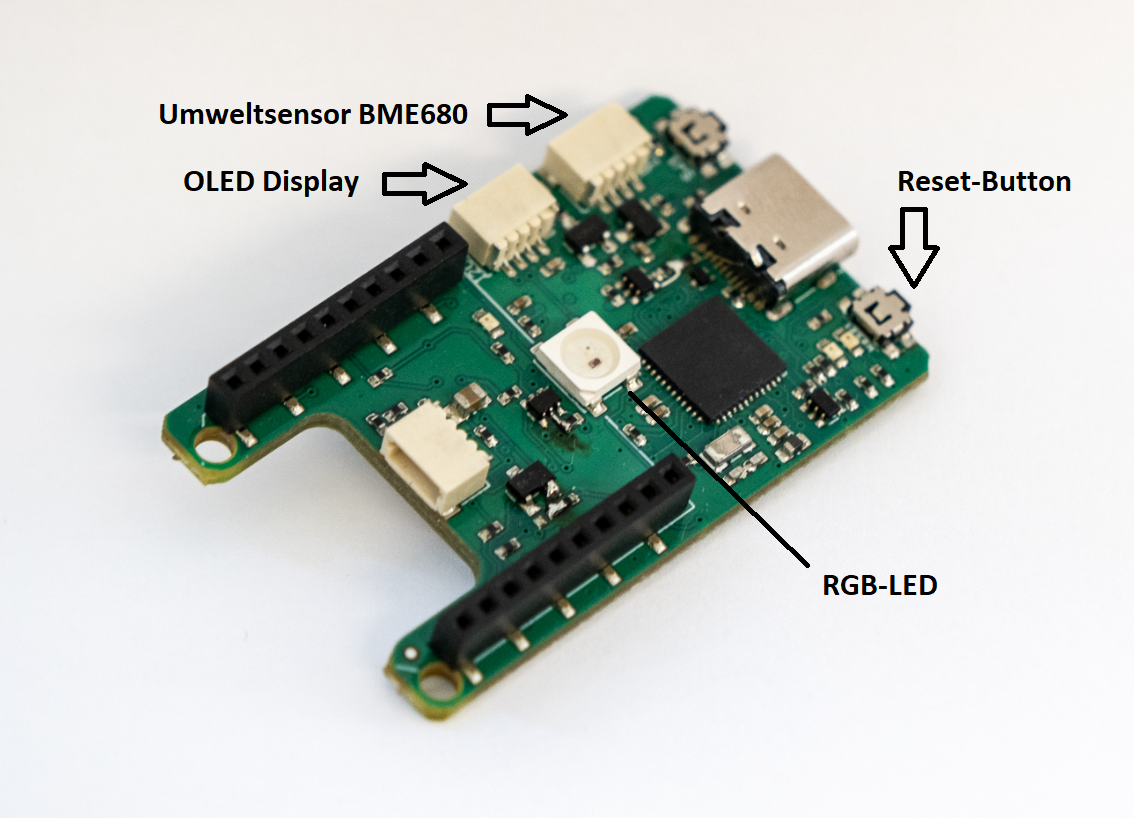
In this project, the senseBox:mini is used to build a traffic light to check the indoor air quality (IAQ). With the help of the environmental sensor, the measured value is shown on the display in the first step. In the second step, the RGB LED integrated on the board is used to visually support and classify the measured values.
Structure
The OLED display and the environmental sensor are each connected with a cable to one of the two I2C connections.
Programming
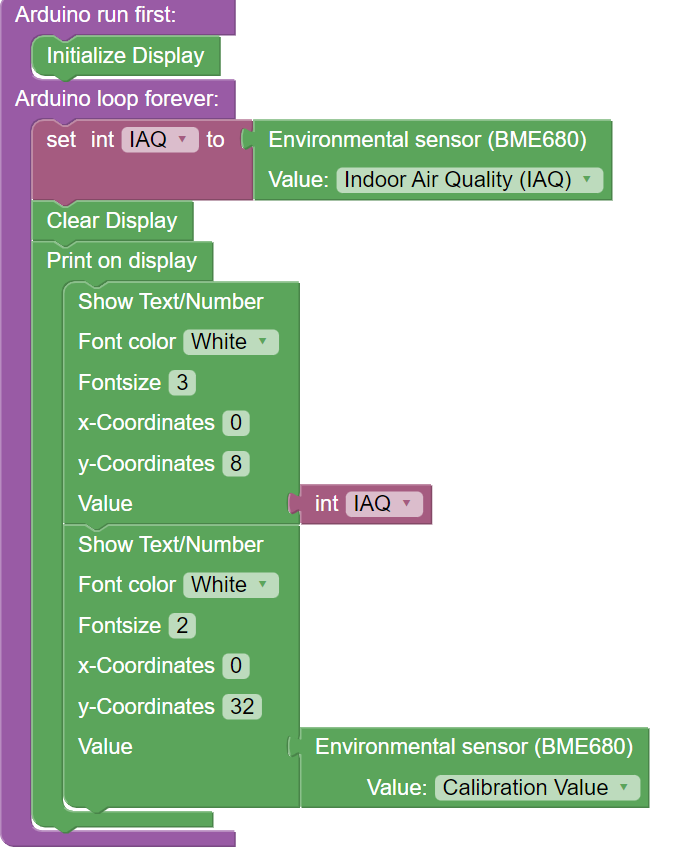
The programming of the measuring station is carried out in Blockly. In the first step, the measured values are read out and shown on the display. In the second step, the corresponding traffic light is programmed.
Step 1: The indoor running quality indicator on the display
Initialise the display in Setup() and insert the block Show on the display into the endless loop. With the block Write Text/Number you can show the respective measured values on the display. For this purpose, insert the block Create text from from the category ‘Text’ in ‘Value’. With the help of a text field you can then add the label to the respective sensor value. The latter is displayed by inserting the Environmental Sensor (BME680) as a block and selecting the corresponding environmental phenomenon, the indoor air quality. For the further course it makes sense to define a variable for this measured value. Create a variable of the type int and name it ‘IAQ’. You can then insert the block of the variable at all places where you would otherwise insert the block of the environmental sensor. To ensure that the measured value is permanently updated, insert the block Display Clear at the end of your programme.
Note: Calibration of the sensor
To provide reliable readings, the BME680 sensor calibrates itself based on the ambient air. The status is indicated by the calibration value. It is therefore useful to have this also shown on the display so that you can see whether the calibration is complete and the readings can be used. If the sensor is not calibrated or is in the process of calibrating, measured values are output but should not be used. The following values are available for the calibration value:
0: The sensor has just been started and is in the warm-up phase. 1: The measured values so far show too little difference and cannot be used for calibration. 2: The sensor is being calibrated 3: The calibration of the sensor is completed. The calibration process may take a long time (>12h) and then shows the value 1. If the calibration does not start or is not completed after this time, it may be helpful to change the environmental parameters, e.g. by shocking ventilation in the room or holding the sensor in your hand for a certain time.
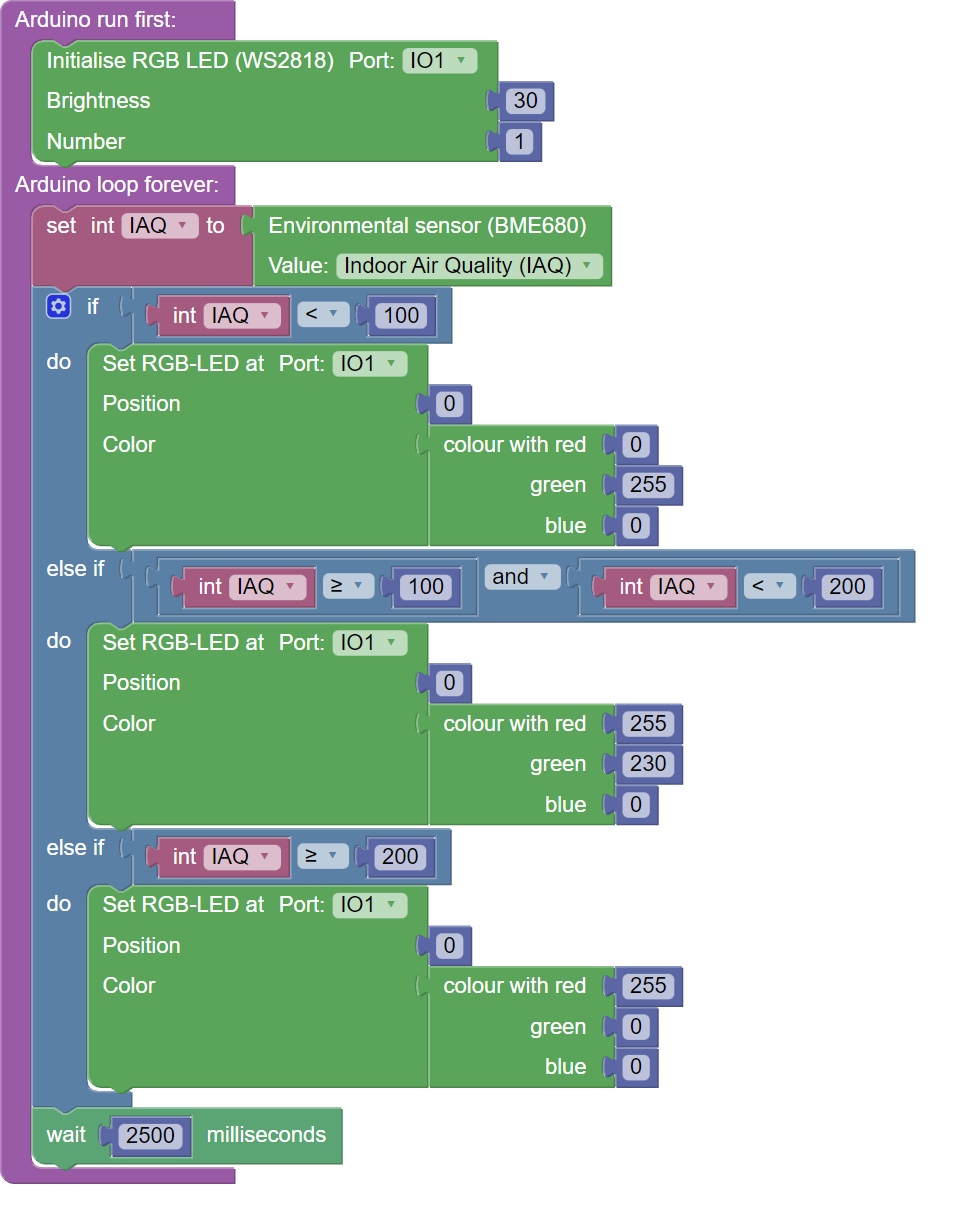
Step 2: The traffic light
At this point, you will see a number on the display. This is the index for the indoor air quality. The following table helps you to classify the measured value in the context of the application (source: Bosch 2022):

To make this value directly interpretable for other people, we now want to add a traffic light to the display, so that a green light stands for good air quality and a red light for poor air quality. To do this, you need three if-then conditions from the category ‘Logic’. Here you add limit values in relation to the measured air quality (category ‘Mathematics’), which can be exceeded or fallen short of, in accordance with the table. Depending on the value, the RGB LED then lights up green, yellow or red. You can choose these colours yourself by setting a value between 0 and 255 for the colours red, green and blue. Depending on the ratio of the assigned values, different colours are created.
Entire code
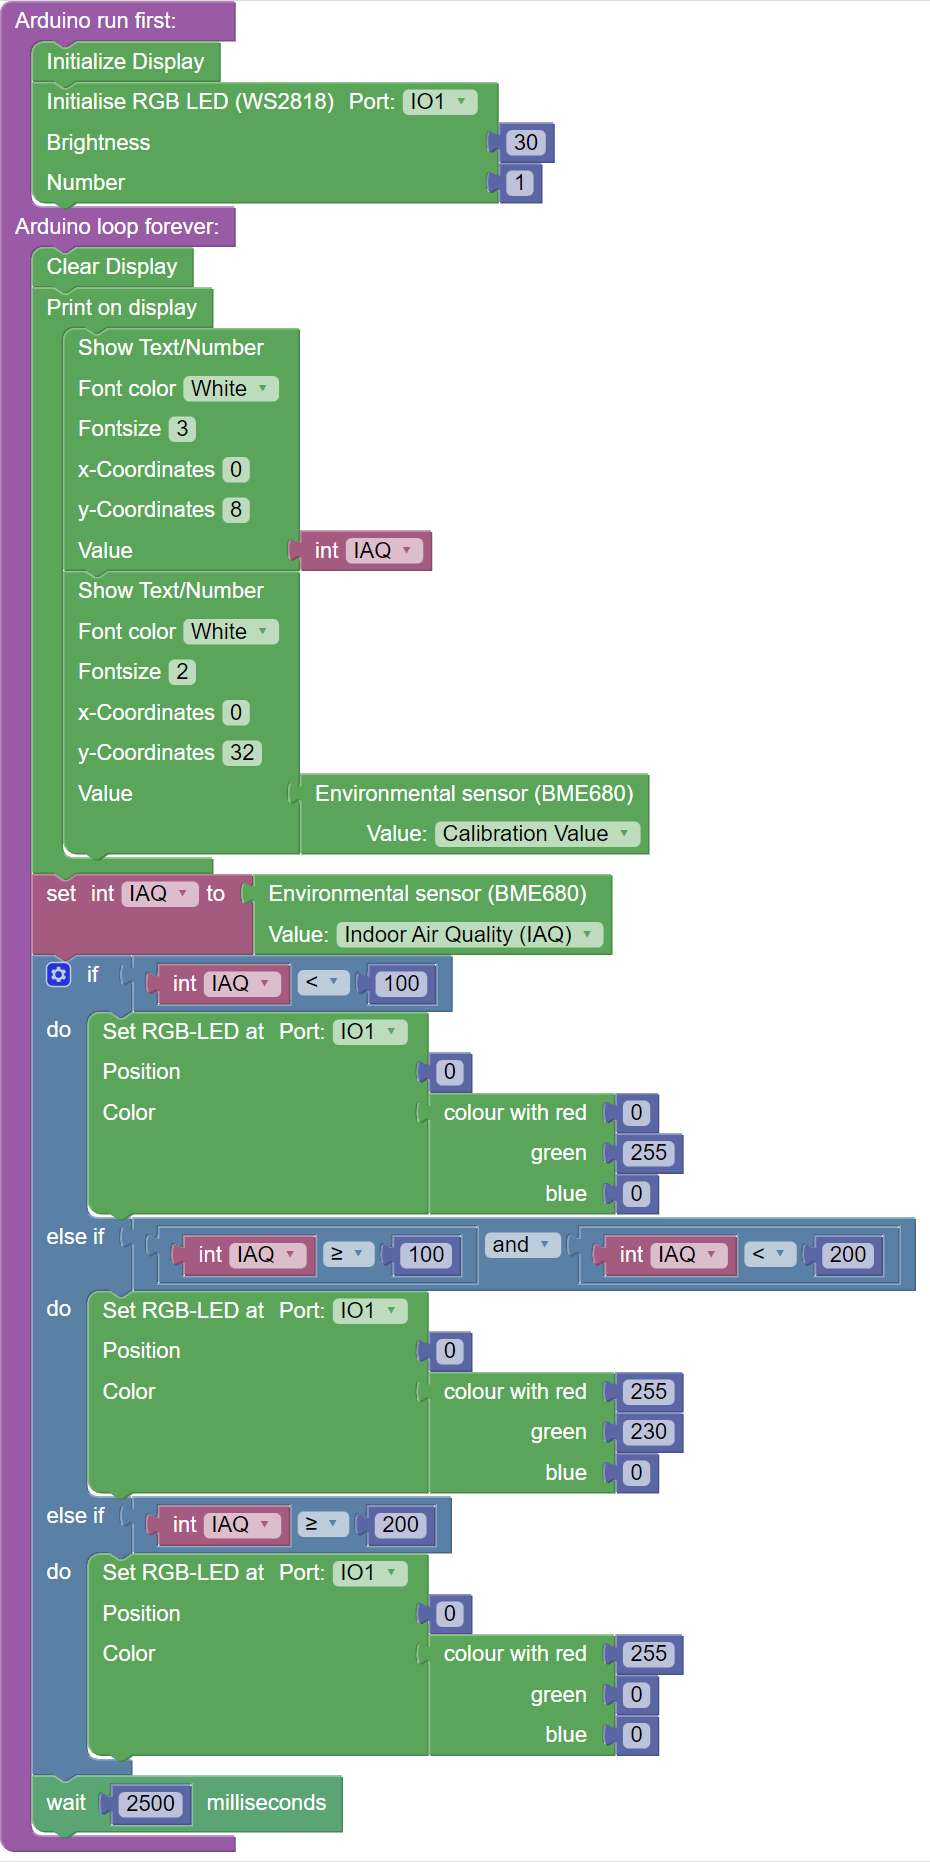
Look at the programme code in Blockly: IAQ traffic light
Now compile the program code and transfer it to the senseBox MCU mini.