In this project, the senseBox:mini is used to build an environmental measuring station. With the help of the environmental sensor, measured values such as temperature, air pressure or humidity are shown on the display in the first step and saved on the SD card in the second step. This allows the environmental phenomena mentioned to be collected over a longer period of time and then analysed.
Structure
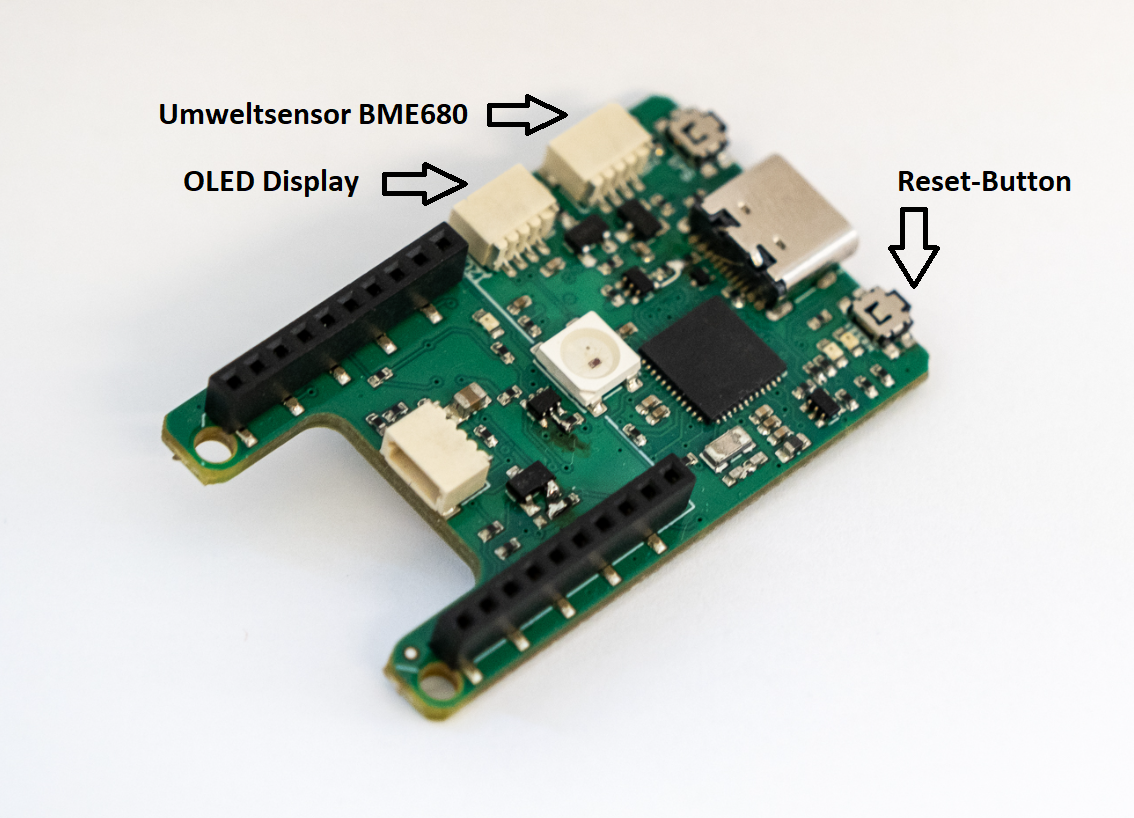
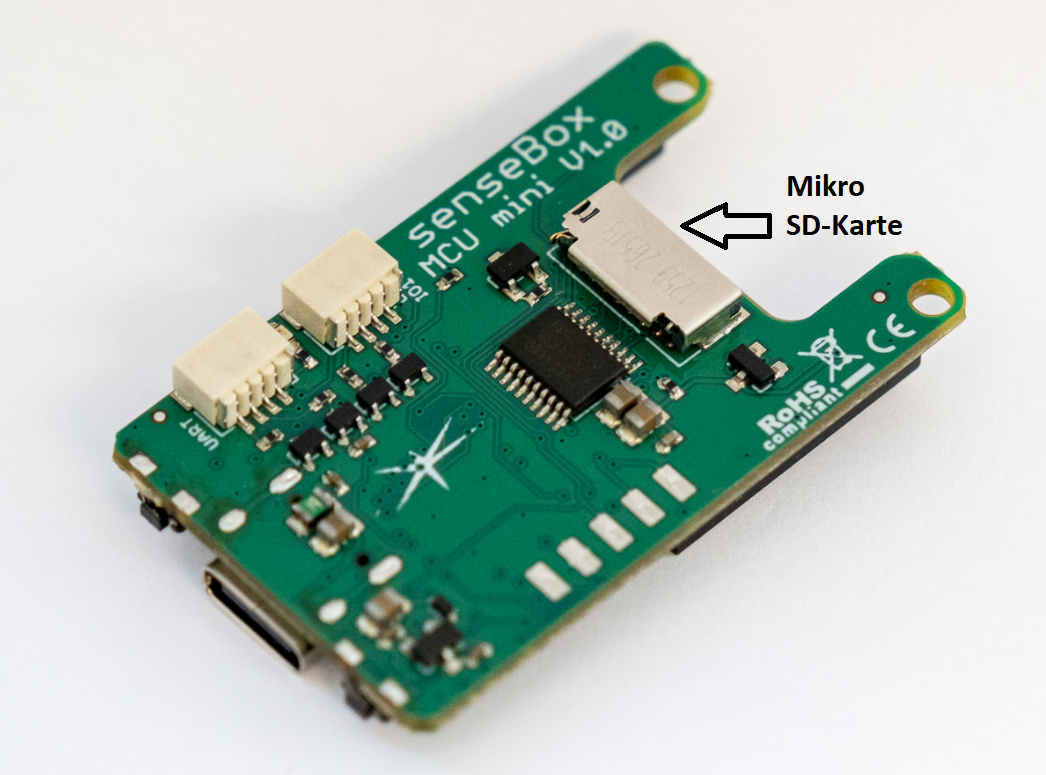
Insert the micro SD card into the SD card slot provided. The OLED display and the environmental sensor are each connected with a cable to one of the two I2C connections.
Programming
The programming of the measuring station is carried out in Blockly. Select the senseBox MCU mini as the board for this. In the first step, the measured values are read and shown on the display. You can then end the project or continue with saving the environmental phenomena on the SD card.
Step 1: The indication of an Umwlet phenomenon on the display
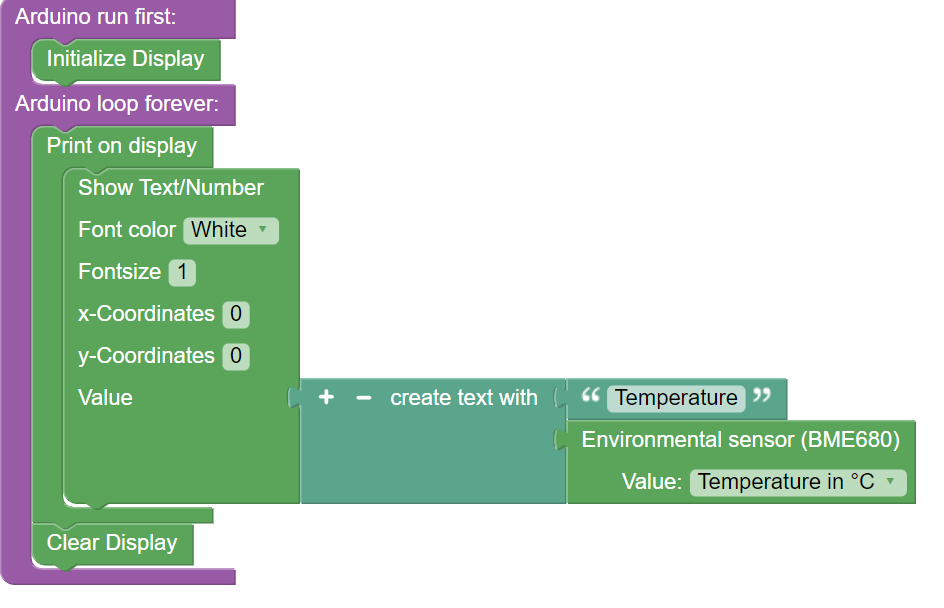
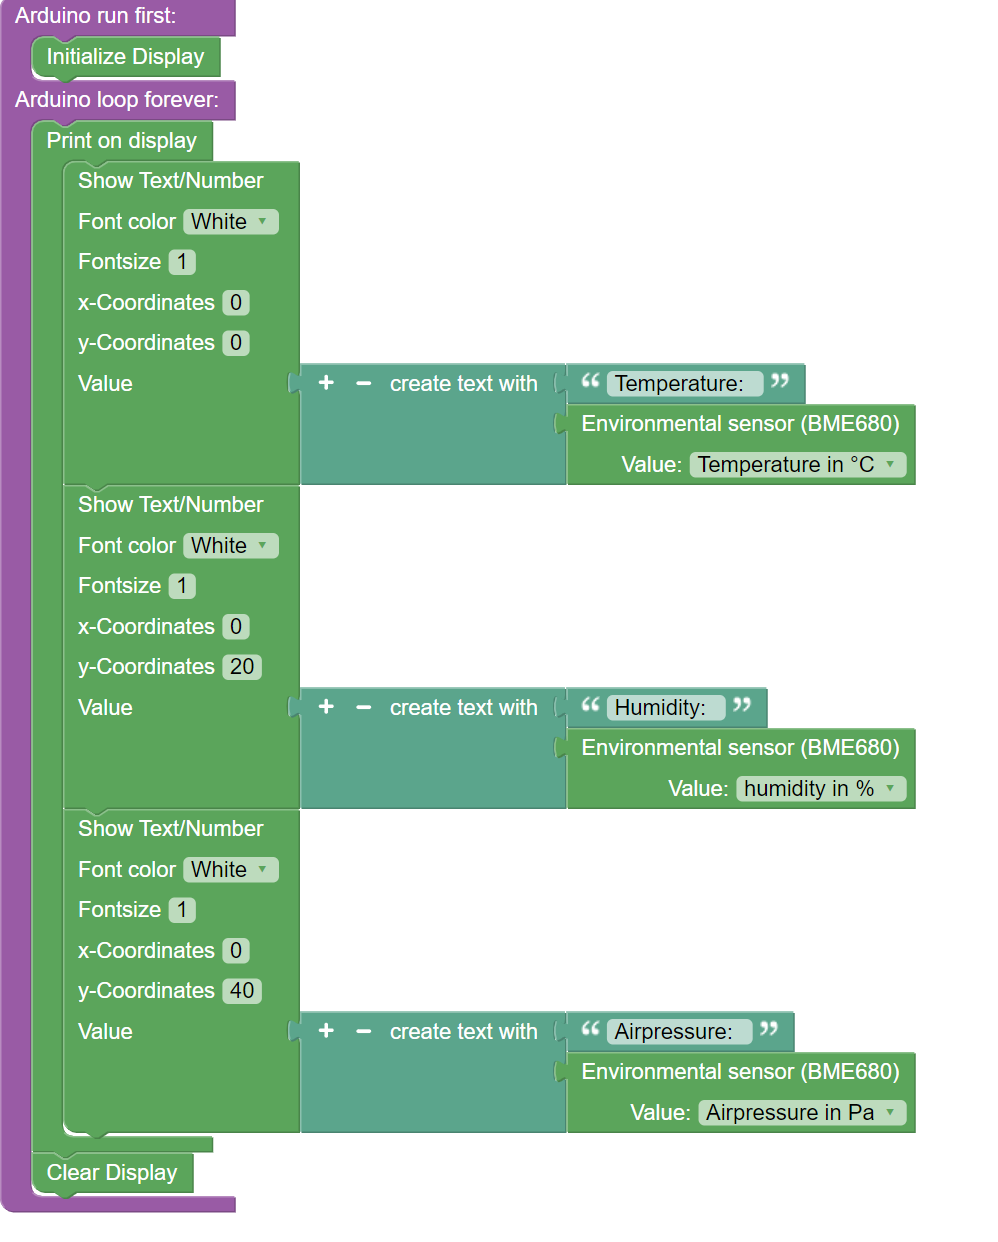
Initialise the display in Setup() and insert the block Show on the display into the endless loop. With the block Write Text/Number you can show the respective measured values on the display. For this purpose, insert the block Create text from from the category ‘Text’ in ‘Value’. With the help of a text field you can then add the label to the respective sensor value. The latter is displayed by inserting Environmental Sensor (BME680) as a block and selecting the corresponding environmental phenomenon. To ensure that all measured values are permanently updated, add the block Display Clear at the end of your programme.
Step 2: Showing other measured values on the display
To show more measured values on the display, you can repeat the procedure from step 1. Copy the existing blocks and change the respective labels as well as the selection of the environmental phenomenon. To ensure that all measured values are actually shown, you must adjust the placement on the display. You can determine the height of the text by specifying the pixels on the y-axis. This can vary between 0 and 64. To show the text for three measured values at a suitable distance on the display, we recommend, for example, steps of 20.
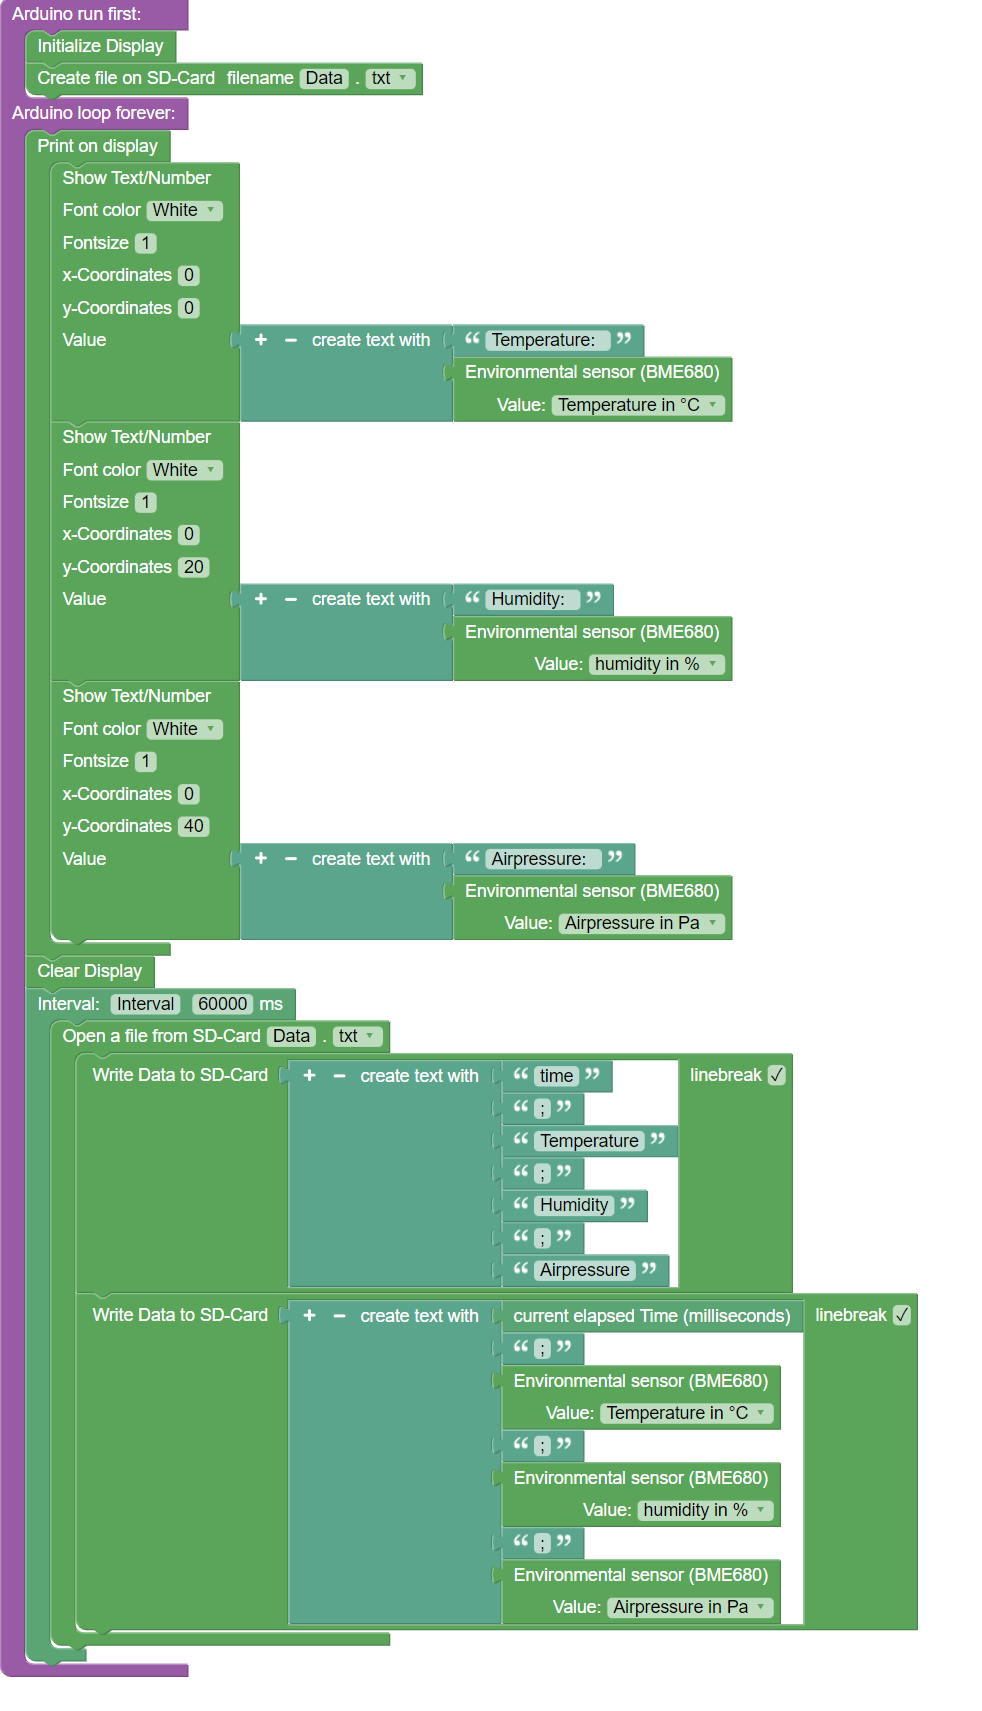
Step 3: Saving the measured values to the SD card
To be able to check the development of the measured values over a longer period of time, it is recommended to save them on the SD card. First, a file must be created in the setup for this purpose, in which the stored data can be found. Then you define the interval at which the measured values are to be collected. Depending on the application context, different time periods are recommended. Next, the previously created file on the SD card must be opened so that the corresponding measured values can be entered there. To do this, first add a label and then the corresponding sensor values. By activating the line break and inserting a semicolon, the measured values are then clearly displayed.

Entire Code
Have a look at the programme code in Blockly: Mini-environmental measuring station
Now compile the program code and transfer it to the senseBox MCU mini. After collecting the data, you can read out the SD card with your laptop or PC. The collected environmental data will then be displayed in a simple text programme. You can then import this data into Excel or other data processing programmes and, for example, analyse and visualise it.