Parking assistance
Parking the car in reverse can be a difficult thing to do. However, with a parking sensor in the car, it becomes much easier. But how does such a helper works?
Structure
The ultrasonic sensor is plugged onto the breadboard and connected to a digital/analogue port using the adapter cable. The black cable is connected to the GND pin of the sensor, the red cable to the VCC pin, the green to the ECHO pin and the yellow to the TRIG pin. The pins of the sensor are labelled on its front and back. It is best to connect the sensor so that the wires are behind the sensor, otherwise they will distort the measurements. The piezo is connected in a similar way to a single-colour LED. The shorter leg is connected to the negative pole (black cable), the longer leg to a digital pin (green or yellow cable). You can connect a resistor in front, but this is not necessary and only makes the piezo quieter.

Programming
The aim of the programming is to create a parking aid that beeps faster the closer the car gets to an object.
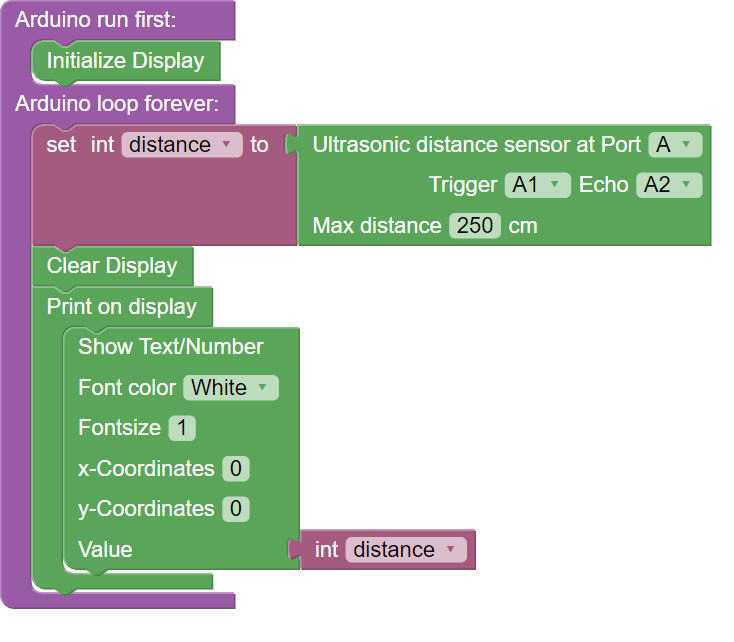
Step 1
In order to programme a parking aid, the first step should be to display the measured values of the ultrasonic sensor. This will help you to better assess which distances are suitable for your parking assistant. In addition working in small steps makes troubleshooting much easier. To do this, use a variable that you must define as ‘int’ when you create it. To display the measured values, you need the following blocks:
Step 2
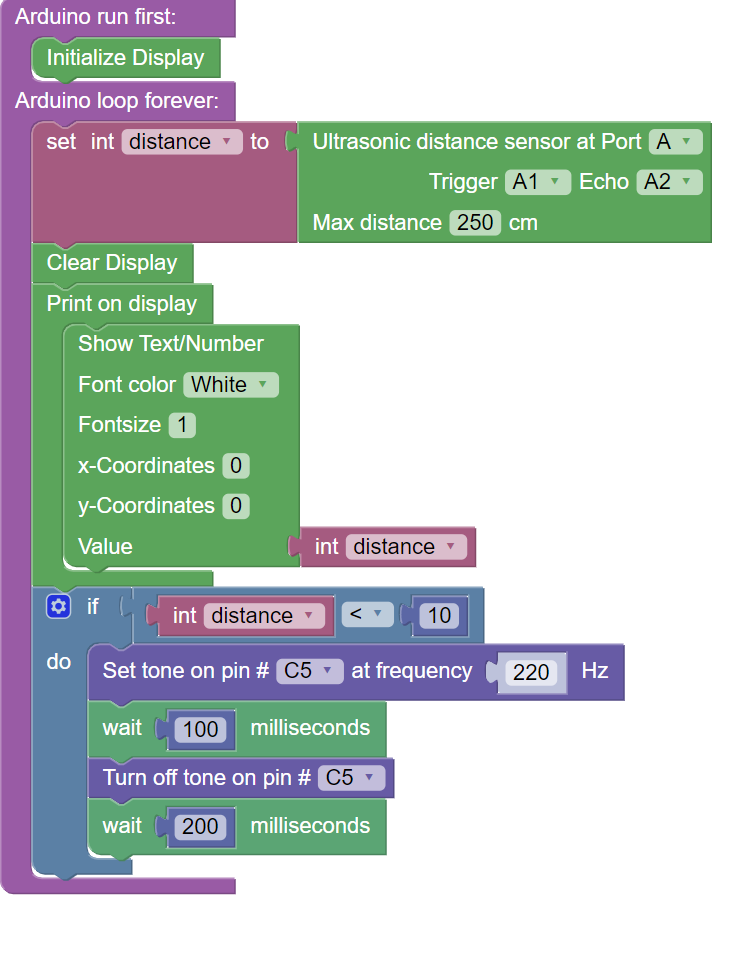
When the measured values are displayed, the next step follows. You have to add decisions that determine how fast the beeping should be at which distance. This is done with the “if…do” block from the Logic category. First, it’s best to start with a single condition that will then make the piezo beep, if the measured distance is less than 10cm.
Step 3
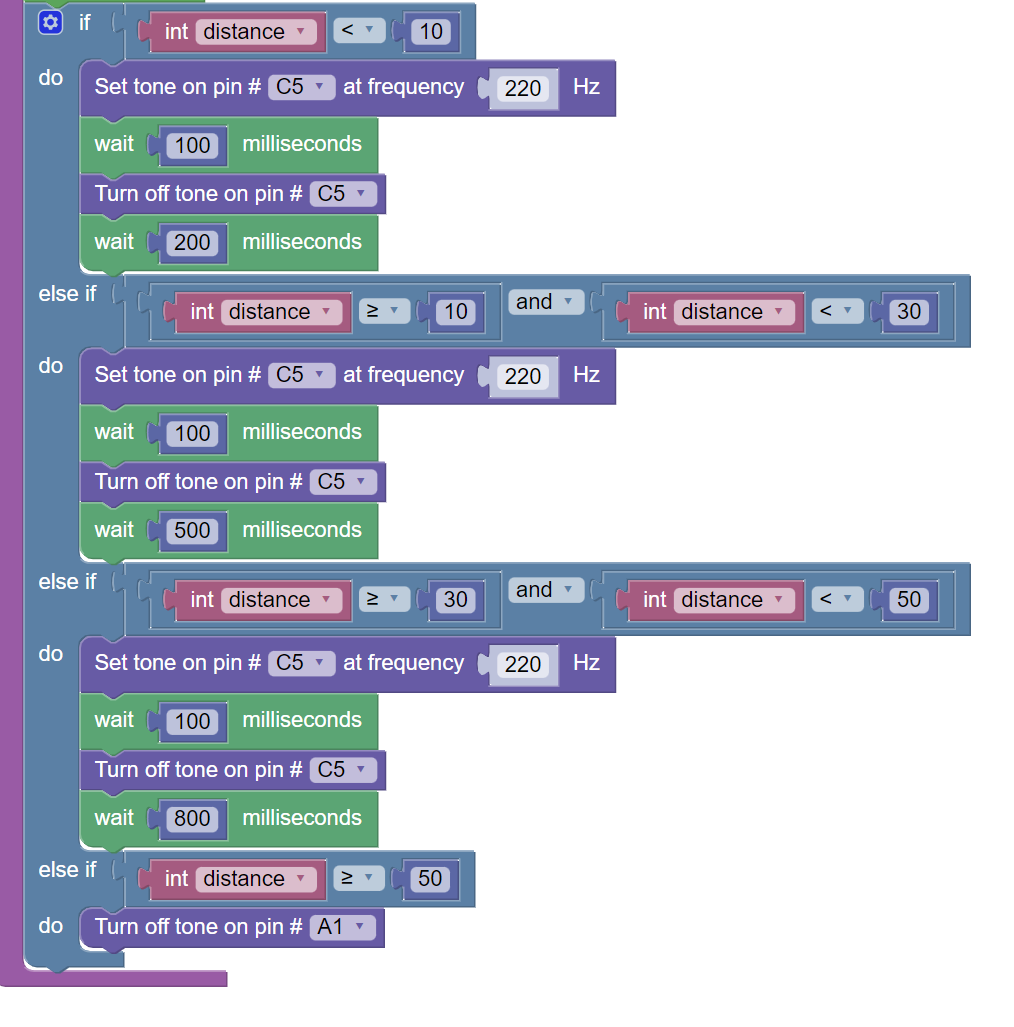
Now you have to add more decisions so that the frequency of the beep changes according to the distance. To do this, you can add more decisions with the cogwheel in the top left corner of the “if do” block you can add more decisions. In these you should then add the waiting time after the beep, as well as the respective distance. You also needthe “and” block from the Logic category to set the start and end distance for the middle and last condition. At the end, the beeper must be switched off when the car is far enough away from an object.
Entire Code
You can find all the code in Blockly here.